Full MERN Stack App: 0 to deployment on Kubernetes — part 5
In the fifth part, I will talk about deploying our app on Kubernetes and using CI/CD pipelines for faster deployment.

Welcome back to the fifth part of the series. Today we will in-detail talk about deploying our app on Kubernetes. We are going to make our initial deployment manually and use the CI/CD pipeline we built for future deployments.
If you haven’t read my fourth part yet, please follow the link below.
Kubernetes simplified
If you came here from my fourth part, then you would have already installed kubectl, set up the CI/CD pipeline and have a cluster running on GKE. If not, please go to my fourth part and have a read. Now let’s try to understand the Kubernetes architecture in simple terms.

A Kubernetes cluster consists of nodes. If you are using GKE, your node will be a Google Compute Engine instance. Each node consists of pods and services. A pod consists of one or many running containers made from Docker images. Services are used to expose pods inside a node or into the outside world. Pods are stateless and highly volatile. They come and go. We deploy our app inside pods. We can deploy the back-end, front-end, workers and MongoDB all inside the same pod but that is not a very scalable approach. We might only need one MongoDB instance, one or two front-end and back-end instances, and several workers. So we deploy them in separate pods so they can be scaled independently.
Two containers inside a pod can talk to each other easily using localhost but if they are in separate containers, i.e. our back-end and MongoDB, the pod needs a service. The service’s job is to make sure that other pods can discover and communicate with its managed pod. We do not directly talk to a pod but go through a service because, as I said earlier, pods come and go and their IP addresses might change over a matter of minutes and the existing pods will have to keep track of the changes. But services are a more stable and long-running entity and we let the services to keep track of the pods and we talk to the service instead. Even the services may have different IP addresses over time but a particular service has a consistent service name and when we want to connect to a service, we call it using its name. Kubernetes can resolve the service’s name into an IP address using its DNS resolver service.
There are many ways to launch a pod. Each way has its own benefits and needs a similar set of parameters. We need to specify the Docker image(s) to be run in the pod, what ports to be exposed from the container, what other pods this pod needs to talk to and a pod name preferably. This is called a pod definition and they follow the YAML syntax. Services have their own definitions. To launch a pod, we can use many controllers available in Kubernetes such as,
I am using the third approach because they allow us to provide declarative updates for pods which is exactly what we plan to achieve from our CI/CD pipeline. Also, we need to create a service definition for each deployment to expose the pods inside them.
Deploying the back-end
The first deployment of the back-end needs to be done manually and after that, every deployment will be handled by our CI/CD pipeline. We dockerized and pushed our back-end image in the third part of the series so we can directly go into the manual deployment of that image. There are four components to be deployed in the back-end. Let’s discuss one by one.
MongoDB Pod
I am creating a pod definition (not a deployment) because MongoDB pod will not be updated that frequently compared to pods running our back-end or front-end and I will only need one replica of MongoDB.
apiVersion parameter describes the Kubernetes API version we are requiring the pod objects from. kind is used to tell Kubernetes what kind of object we are creating. metadata is used to give the pod a name and a label. in the spec.containers array, we specify the Docker images we want to be run on this pod and a name for that container. We are pulling mongo:4.0.4 image from Docker hub and once it is run, we expose port 27017 from container and we assign it a name, mongodb-port.
MongoDB Service
This is the service definition required to expose our pod running MongoDB into the node.
This is the same as our pod definition, except now the kind is of “Service”. The service name we specified in metadata.name is the one we used in our server.js file in part 2. The spec array specifies the port we are exposing from the pod. We have assigned to be the default MongoDB port. The selector parameter is used to specify the pod we are exposing. See line #6 of the above MongoDB pod definition. We do not want any external traffic reaching into our database so we limit the pod access only within the cluster by assigning the port type ClusterIP.
Back-end Deployment
This is a Deployment definition. The apiVersion is now “apps/v1” and kind is Deployment. It too has a name and a spec array. We can specify how many replicas of this pod should be created. For now, I am creating only one. The spec.template.metadata.spec array is exactly similar to our pod definition above. It specifies the Docker images to be run and ports to be exposed. Our NodeJS back-end is running on port 5000 so I am exposing port 5000 from container and naming it “nodejs-port” to be identified by the service so the service could expose it from the pod into the node. The selector parameter is used to specify the node the pod should be created on and useful if we have multiple nodes.
Back-end Service
This is as same as our MongoDB service definition. It exposes port 5000 from the container running our NodeJS back-end into the node. This service’s name will be later used when we are deploying our front-end because our front-end pods need to find and communicate with back-end pods. And one more important thing.
In order for pod A to discover pod B through service of pod B, service of pod A needs to be created before creating pod A. Pod B needs to be created before creating service of B. Otherwise pod A won’t be able to connect to pod B using DNS resolving.
According to the above theory, the order of creation of our objects is,
- MongoDB pod
- MongoDB service
- Back-end pod’s service
- Back-end deployment
To apply our defined YAML files, we can use kubectl create command. Open a terminal where our YAML files are and then run,
kubectl create -f mongodb-pod.yml
kubectl create -f mongodb-service.yml
kubectl create -f cloudl-server-service.yml
kubectl create -f cloudl-server-deployment.yml
Once it is done, our cluster should be running two pods and two services. We can view them by executing,
kubectl get podskubectl get svc
The log of an individual pod can be viewed by kubectl logs <pod_name> command.

We can see that our back-end is running successfully on pod “cloudl-server-deployment-69c97c7d74-lsz5c” and it successfully connects to our MongoDB pod! Our two services are also running successfully on IPs 10.0.4.217 and 10.0.12.41 inside the node.
Deploying the front-end
We only have two components in the front-end to deploy. Let’s discuss one by one.
Front-end Deployment
This is very similar to our back-end deployment. The only difference is the port we are exposing is now 80, which is the HTTP port. I used Nginx to serve our built React app in the third part which is running on port 80 on the Nginx container. Unlike our back-end, the front-end needs to be accessible from the outside world (over the internet). To do that, we need a special kind of service.
Front-end Service
If you can remember, all our previous service definitions had “NodePort” as the port type but our front-end service’s port type is “LoadBalancer”. Previous services expose the pods using internal IPs which are only accessible inside the node but not from the outside world. The front-end must be accessible from the outside world or otherwise, none would be able to visit our web app. The LoadBalancer type services expose pods using an external IP which is accessible over the internet. There are other ways to do that but for now, we are using Kubernetes’ build-in load balancer service. It exposes the pod running Nginx over the default HTTP port.
Now we can deploy our front-end using kubectl. As earlier, the order matters. Deploy the service first, then the deployment.
kubectl create -f cloudl-client-service.yml
kubectl create -f cloudl-client-deployment.ymlkubectl get svc

Once they are deployed, you will get an external IP for the cloudl-client-service. Open this IP address on a web browser and you can view our web app!
CI/CD for subsequent builds and deployments
Now it is time to finally utilize the CI/CD pipeline we configured. Say you have updated the back-end source code. If we were to manually deploy the new back-end on the cluster, we would have to,
- Test the new code
- Build a new Docker image
- Push it to Docker hub
- Maybe delete the current deployment on Kubernetes?
- Update the deployment YAML files with the new Docker image’s tag
- Then create a new deployment using kubectl and new YAML files?
Now, this seems like a lot of work. Especially if you are making many small changes. Either you will have to wait till a lot of changes stack up to deploy them all at once? But then you would not see the result of your code change until some time. Lucky for us, we can just push our changes into our Git repository and let our CI/CD pipeline to take care of the rest. That is,
- Build a new Docker image from changed source code
- Tag it and push it onto Docker hub
- Tell Kubernetes to pull and deploy the latest image
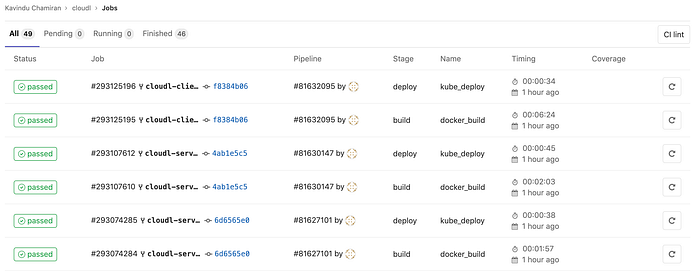
We have pushed the initial commit and configured our CI/CD pipeline to do the above steps using the gitlab-ci file in the fourth part. Now make a small change in your source code that is visible to you i.e. the console message the back-end prints when the server starts. Then add it, commit it and push it to the right branch and quickly goto GitLab → CI/CD → Jobs to see our pipeline building and deploying the updated back-end. You can view the job history and logs on GitLab.
Conclusion
In the next article which is the sixth part of the series, I am going to talk about how to add health and readiness checks to our pods and configure auto-scaling to handle high-load. I hope this article was interesting and you will also read the sixth part. Just click the link below!
PS: Claps are appreciated!